ControlNet is one of the most powerful tools in ComfyUI, allowing you to guide AI-generated images with precision by using structural maps like Canny edges and Depth maps. Whether you’re refining composition, adding dimensionality, or applying intricate style effects, ControlNet can turn your creative vision into reality.
This guide will not only show you how to set up ControlNet, including simultaneous Canny and Depth detection, but also explain what ControlNet models are, where to find them, and how to integrate Flux-specific ControlNet models for even more customization.
What Are ControlNet Models?
ControlNet models are pre-trained AI components designed to extract structural guidance from input images. They act as specialized tools that analyze and process your input into formats the Stable Diffusion model can understand, such as:
- Canny Edge Models: Extract sharp edges and contours.
- Depth Models: Capture spatial depth for dimensional accuracy.
- Pose Models: Detect human poses for dynamic compositions.
- Segmentation Models: Divide images into meaningful regions, such as sky, ground, or objects.
ControlNet models are typically lightweight and work as modular additions to your ComfyUI setup, enabling high levels of control over your generated outputs.
Where to Download ControlNet Models
If you don’t already have ControlNet models installed, you can download them from trusted sources:
- Canny, Depth, and Segmentation Models:
- Hugging Face ControlNet Repository
- ComfyUI Community Resources
- Flux-Specific ControlNet Models:
- Flux offers specialized ControlNet models for its ecosystem, such as Flux Depth and Flux Canny. These models are optimized for Flux workflows, enabling finer control over style and structure.
- Flux GitHub Repository
Installing ControlNet Models
- Download the Model Files
Look for
.safetensorsor.ckptfiles corresponding to the ControlNet feature you want (e.g., Canny, Depth, Pose). - Save in the Correct Folder Place the files in the ComfyUI/models/controlnet directory. If the folder doesn’t exist, create it.
- Restart ComfyUI Relaunch ComfyUI to load the new models automatically.
Basic ControlNet Setup in ComfyUI
Step 1: Load Your Base Model
- Download a Stable Diffusion model, such as v1.5 or SDXL.
- Save the model file in ComfyUI/models/checkpoints.
- Add a
Load Checkpointnode to your workflow and select the base model.
Step 2: Load an Input Image
- Use a
Load Imagenode to upload your input image. - Connect the
Load Imagenode to the ControlNet setup.
Step 3: Add a ControlNet Node
- Add a
ControlNetnode to your workflow. - Select the desired ControlNet model:
- Canny for edge detection.
- Depth for spatial guidance.
- Connect the
Load Imagenode to theControlNetinput.
Step 4: Add a Prompt
- Add a
CLIP Text Encodenode and write a creative prompt:- “A realistic portrait with soft lighting and natural colors.”
- “A futuristic city with glowing neon lights.”
- Connect the node to your workflow to guide the image’s content and style.
Step 5: Configure the KSampler
- Add a
KSamplernode to your workflow. - Key parameters:
- Sampling Steps: Start with 20–50 for high-quality outputs.
- CFG Scale: Set to 7–10 to balance adherence to the prompt and structure.
- Denoising Strength: Keep it between 0.5–0.7 to blend the input and generated image.
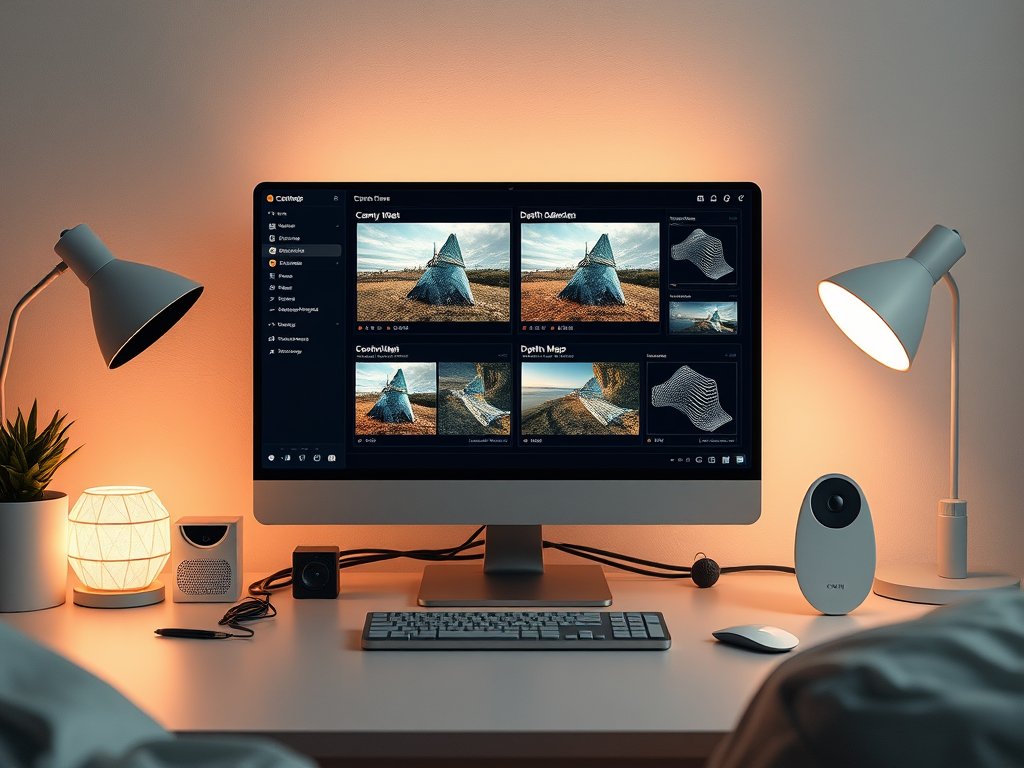
Advanced Setup: Simultaneous Canny and Depth Detection
Combining Canny and Depth maps allows for both structural precision and spatial realism. Here’s how to configure both simultaneously:
Step 1: Add Multiple ControlNet Nodes
- Insert two separate
ControlNetnodes into your workflow. - For Canny Detection:
- Select the Canny Edge Detection Model.
- Connect the
Load Imagenode to this ControlNet node.
- For Depth Detection:
- Select a Depth Model (e.g., MiDaS or Flux Depth).
- Connect the
Load Imagenode to this ControlNet node.
Step 2: Balance ControlNet Weights
Each ControlNet node has a strength slider:
- Canny Weight: Start with 0.6–0.8 to define edges.
- Depth Weight: Set to 0.7–0.9 for spatial accuracy. Adjust these values to prioritize one aspect over the other.
Step 3: Add a Prompt
Craft a prompt that complements the structural input:
- For detailed outputs: “A vibrant cityscape with intricate architecture, glowing neon lights, and realistic perspective.”
- For softer styles: “A serene landscape with lush greenery, soft lighting, and natural depth.”
Step 4: Generate the Output
- Add a
Save Imagenode to export the final result. - Run the workflow to generate your image, guided by both edge and depth maps.
Flux-Specific ControlNet Models
Flux offers specialized ControlNet models, such as Flux Depth and Flux Canny, designed to work seamlessly with its ecosystem. These models provide:
- Enhanced Precision: Flux Depth captures finer spatial details.
- Optimized Edge Guidance: Flux Canny ensures clean, well-defined edges for structural integrity.
- Style Integration: Flux models can blend structural data with specific aesthetics, making them ideal for high-quality, stylized outputs.
Pro Tip: Use Flux ControlNet models with Flux LoRAs for even greater control over style and composition.
Tips for Effective ControlNet Use
- Start Simple Experiment with either Canny or Depth first before combining them.
- Use Quality Input Images High-resolution images produce better edge and depth maps, leading to more accurate outputs.
- Adjust Strength Dynamically
Use
Primitive Nodesto fine-tune ControlNet weights in real time. - Compare Results
Use an
Image Gridnode to view outputs from different ControlNet configurations side by side. - Experiment with Flux Models Try Flux-specific ControlNet models for enhanced results in style-heavy workflows.
Example Workflows
Basic ControlNet Workflow
- Nodes: Load Checkpoint → Load Image → ControlNet (Canny) → CLIP Text Encode → KSampler → Save Image.
Advanced Workflow with Combined ControlNet
- Nodes: Load Checkpoint → Load Image → ControlNet (Canny) → ControlNet (Depth) → CLIP Text Encode → KSampler → Save Image.
Flux ControlNet Workflow
- Nodes: Load Checkpoint → Load Image → ControlNet (Flux Canny) → ControlNet (Flux Depth) → LoRA Loader → CLIP Text Encode → KSampler → Save Image.
Final Thoughts: Unlocking Control with ControlNet
ControlNet transforms how you guide image generation in ComfyUI, offering unmatched precision and flexibility. Whether you’re using standard models like Canny and Depth or diving into Flux-specific tools, ControlNet opens doors to highly detailed, creative outputs.
So download your favorite ControlNet models, set up your workflow, and start creating images that are as structured as they are stunning.
